TABLE OF CONTENTS
- Why use Live events?
- Add Live events to a Journey
- Notification and enrollment
- Edit the Live event
- Marking attendance after the Live event
- Flexible completion
Why use Live events?
Live events add a real-time, interactive component to Learning journeys, allowing participants to connect in person or online. This feature enhances engagement and offers a structured way for learners to collaborate and interact.
Add Live events to a Journey
Get started:
- Click the “Journeys” tab
- Choose “New journey” or select an already existing Learning journey in the list
- Click “Edit” under “Learning items”
Create a live event:
- Click the plus button below the learning items
- Select “Live event”
Configure live event:
- Click “Upload image” to replace the live event cover image
- Enter “Title”
- Set the events time zone for all learners
- Specify the event date and time
- Choose the type of live event - "Online" or "In person"
- Add the meeting link if you choose “Online”
- Specify the location if you choose “In person”
- Provide additional details or guidelines under description
- Click “Create”
Notification and enrollment
- Once the Learning journey is published, all enrolled learners will automatically receive an email notification about the live event
- Learners will automatically be enrolled into the event, ensuring they receive all relevant updates
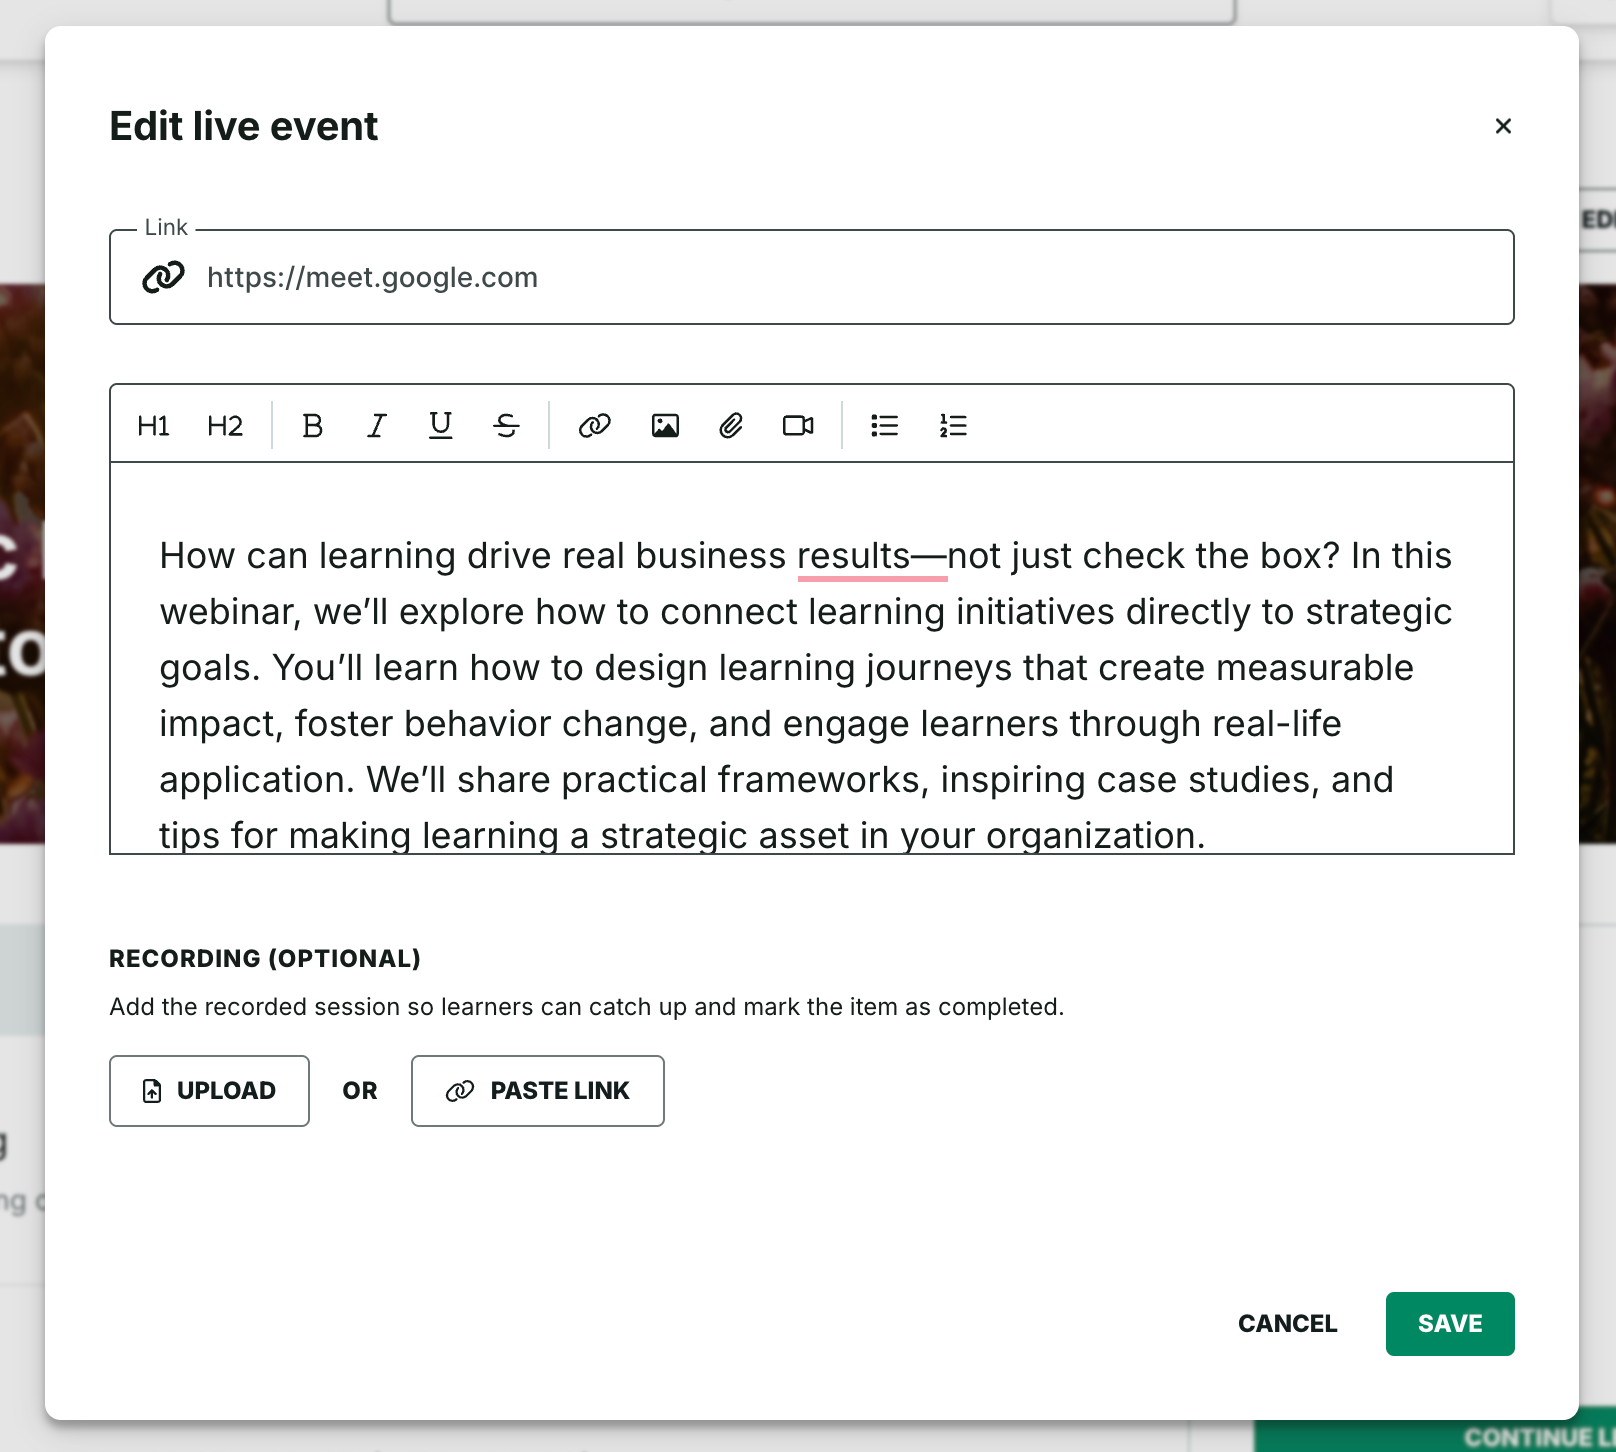
Edit the Live event
- Navigate to the Learning journey page
- Click the live event in the “Learning items” list
- Click “Edit” in the right corner
- Make the changes
Enrolled learners will get notified by email about the changes made in the live event.
Marking attendance after the Live event
When the live event is finished you need to mark learners attendance to give them credit. To do this, your need to:
- Navigate to the Learning journey page
- Click the live event in the “Learning items” list
- Click “Mark attendance” in the right top corner
- Click “Attended” or “Didn’t attend” or
- Select multiple learners and click “Attended” or “Didn’t attend” to set attendance in bulk
- Learners marked as attended will be automatically marked as completed.
Flexible completion
Designed to better support asynchronous learning, learners also mark live event items as completed by watching a post-event recording, regardless of their attendance status.
After a live session ends, admins can add a Recording to the event from the live event editor modal.
Learners will see a Recording section on the webinar page with a Mark as completed button.
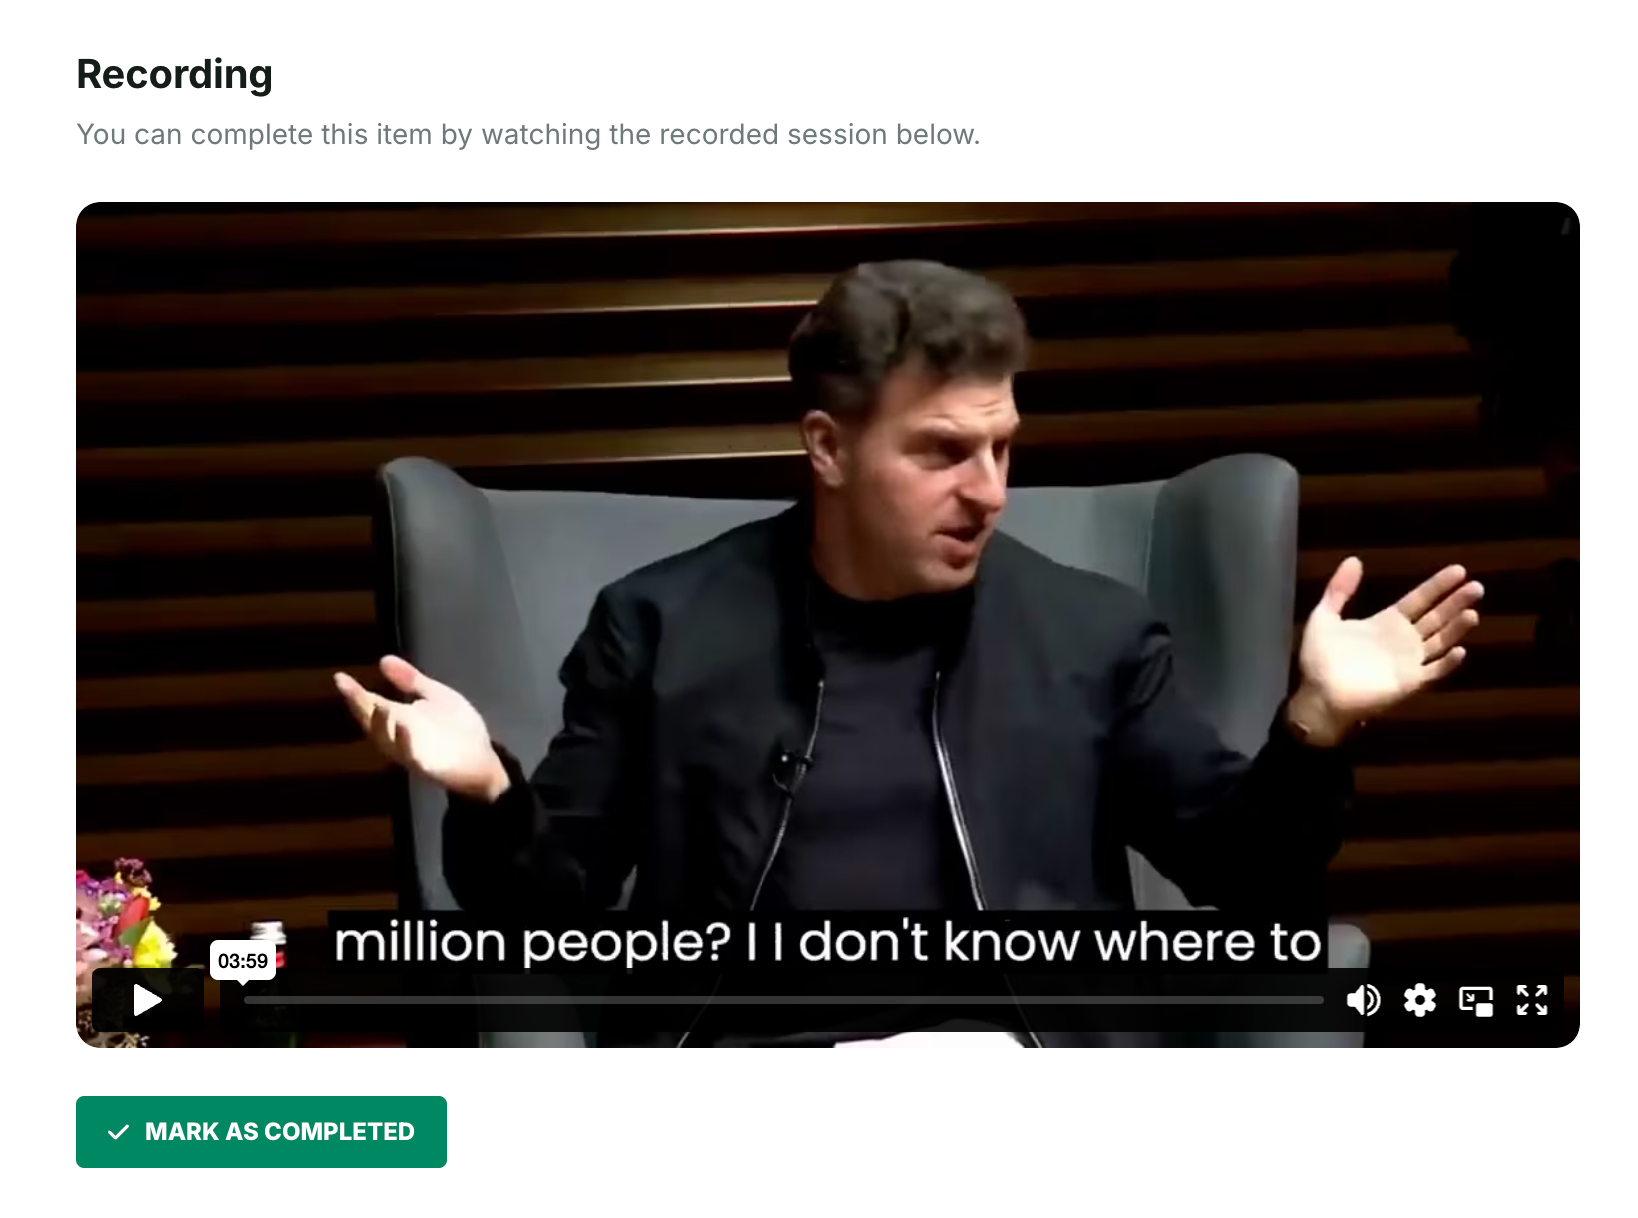
Learners can manually complete the item after watching the recording, whether they attended live or not.
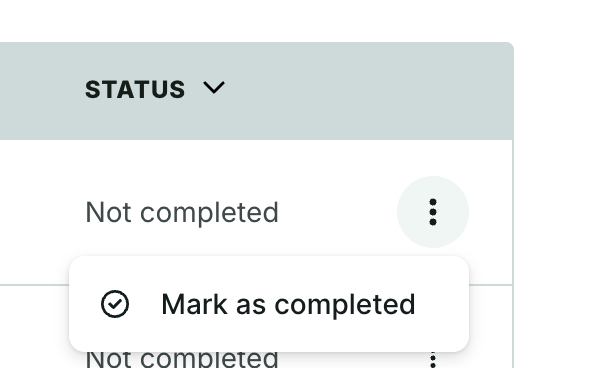
Admins can also manually mark learners as completed from the Live event insights page using the More menu.
Was this article helpful?
That’s Great!
Thank you for your feedback
Sorry! We couldn't be helpful
Thank you for your feedback
Feedback sent
We appreciate your effort and will try to fix the article